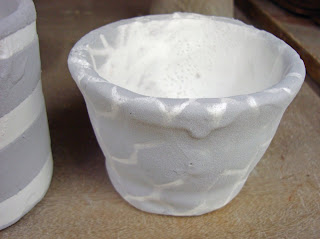

Glazed Bowls. Good white dipped glaze from 1st batch of white glaze. Bleeding blue 2nd glaze. too thick? May not have bound to 1st layer/left to dry too long?
1st Year BA(Hons)Ceramics, Cardiff School of Art.


This term has been about experiencing new ceramic processes and coming up with new ideas. I think I have achieved ideas more than outcomes. The execution of my ideas has not always been as successful as hoped, but I have gained a foundation to build on for future endeavours. I will also learn from mistakes, I feel at present only acquainted with clay but look forward to becoming at ease and enjoying clay more. Once I have more knowledge and understating of clay science and glaze magic.


 This is my first attempt at glazing. As the whole of the 1st year descended on the glaze room at the same time it was chaotic. I found it hard to work with the mess and commotion. I dipped the thrown bowls in white glaze and left to dry. I then brush painted a design onto one bowl and used a squirty bottle to create drips down the sides of the other thrown bowl. I used blue and white glaze for the bowls. The thrown pots were also dipped in the white glaze I then tried spraying green glaze onto the white. I used a shoe lace to create a design on one pot and some packing as a stencil for the second pot. The smaller column pot I tried spraying red glaze at different ranges around the pot to create different effects with the glaze (thick drippy/thin faint). I don't know how well these pots/bowls will turn out. I think some of the glaze is applied to thickly. I dipped the slip cast caterpillar in the white glaze.