Saturday, 7 November 2009

Mould Making Casting


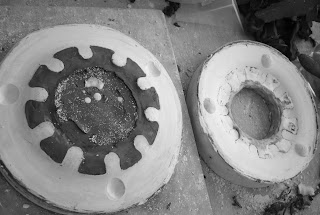
The plaster moulds dried out enough to be slip cast. After securing the pieces together with elastic bands ash white slip is poured into the moulds. The moulds are filled up to the top of the ‘spare’; the slip is left for a few minutes to reach the required thickness. The excess slip is then poured back into the slip blender. The mould is then left upside down on the bench to dry out for at least an hour.

Tuesday, 3 November 2009

Clay project


Fired to: 1000 c - 11oo c - 1200 c - 1280 c oxdation - 1280 c reduduction.


Drawing


Taking a line for a walk. This class was with Ingrid, using charcoal we explored line. This is my most successful drawing of the workshop. The task was to draw a random line across the page and swap with someone. Then use their line to produce a purely abstract picture.

Moulds how-to


The Dust-Buster part was fiddley to cast. The half way mark was already on the part but making sure the clay was level for each point was time consuming. The mould is a 2-piece.


Moulds how-to

Poured plaster over 'dust buster' part. The boards a placed in from each other with the hooks securing tension and hold. Clay is used to seal sides, attention to detail is important as leakages are messy. Plaster should be poured over a hand and not too aggressively.


Moulds how-to


Opened cog mould. Clay will be removed then the metal cog. The mould will be dried off ready for slip-pouring. Using the plate has given a good slope and building up the edges a deeper better mould.

Moulds how-to


Mould top, clay built up in a ring in the centre to produce a thicker cast.